01 Jan Garage Door Remote Programming Instructions
Garage Door Remote Programming
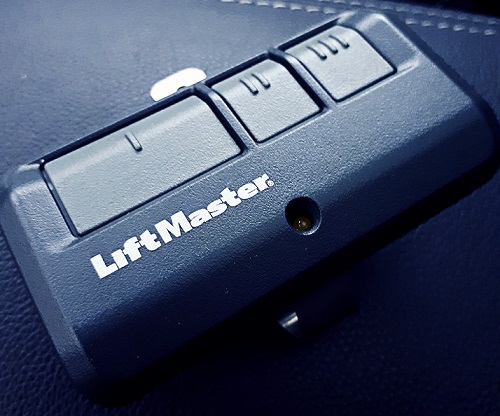
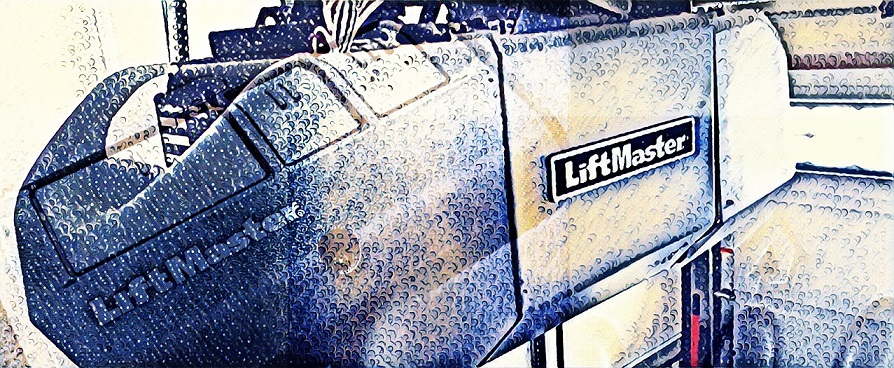
Most garage door systems in Waterloo region use the same typical remote made by Craftsman, Chamberlain or LiftMaster. Remote instruction varies per manufacturer and has similar programming features. Many times you have found yourself struggling to figure out your garage door remote programming, it’s actually quite easy.
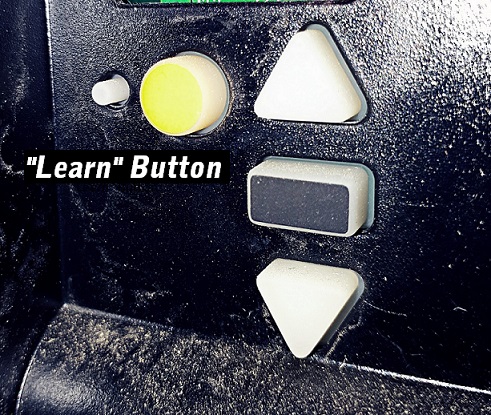
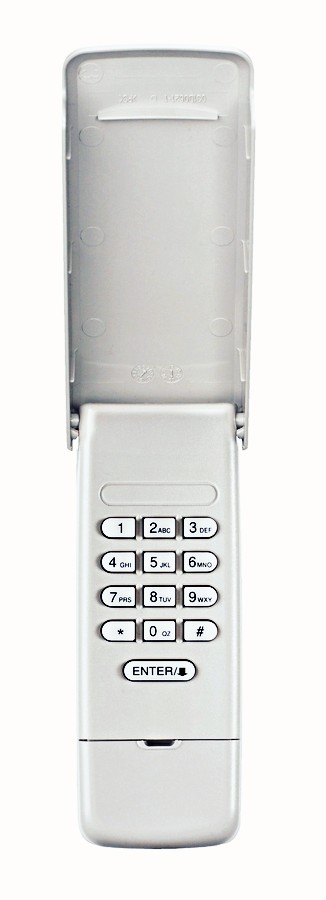
Garage Door Opener Learn Button
Most garage door openers are equipped with a “learn button” which can easily pick up any universal or frequency appropriate garage door remote. Locate the “Learn” button on your garage door opener:
- Press and release “Learn” button on the motor unit. The indicator light will glow steadily for 30 seconds indicating programming sequence is in place.
- Within 30 seconds press and hold the button on the handheld remote.
- Release the button as soon as the motor lights blink which indicates that the motors have learned the new remote!*In case your remote has a programming button on it, press the prog. button on the remote to enter the programming mode prior to pressing on the “Learn” button on your garage door motor unit. Then repeat steps 1-4. Motor unit lights will blink in both options.
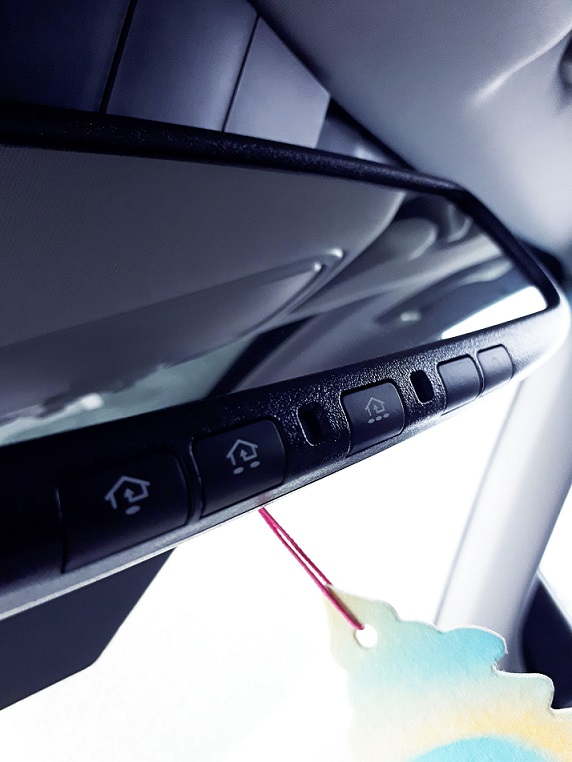
Vehicle HomeLink Remote System Programming
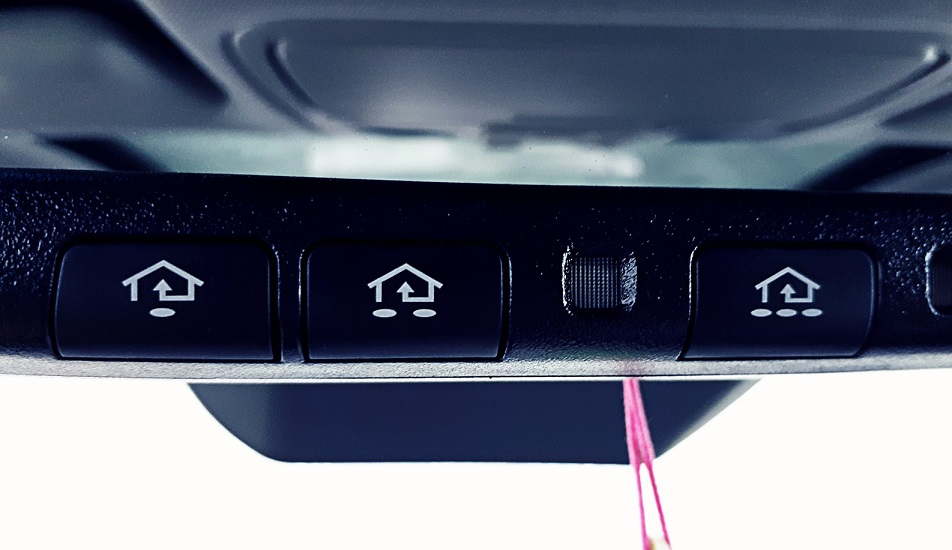
Certain cars (mostly new) come equipped with a HomeLink System for easy garage door access from your vehicle.
- If programming HomeLink buttons for the first time this procedure (step 1) erases factory codes; press and hold 1 and 3 buttons simultaneously for about 20 seconds until the indicator light begins to flash.
- Then, while the indicator light is flashing press and hold one of the HomeLink buttons together with your current garage door remote button simultaneously. Note to have the transmitter within 2-8 cm in mirrors range. (Note that Canadian garage door remotes might not transmit more than 2 seconds, you can simply press your garage door remote button every two seconds together while holding the HomeLink button to learn the frequency.)
- The HomeLink indicator light will first flash slowly then rapidly and that indicates successful programming, buttons may be released!
HomeLink Rolling Code Garage Door Program:
To program a garage door opener equipped with rolling code system you will require finishing the programming procedure specified above. Once your vehicle has learned the handheld remote it’s time for your motor unit to learn the new HomeLink button signal coming from your vehicle:
- Press and release the “Learn” button on your garage door motor unit.
- You now have 30 seconds to press the programmed HomeLink button in your vehicle to approve and confirm the signal. Once pressed the motor unit should learn the new HomeLink button.
In both cases, the HomeLink button needs to learn the remote frequency first.
Erasing programmed HomeLink buttons:
All buttons have to be erased at once.
- Press and hold 1 and 3 HomeLink buttons until the indicator light begins to flash. It takes about 20 seconds (do not hold 30 seconds!)
Note that your HomeLink buttons are now in program mode and can be programmed at any time.
Day/Night Rear View Mirror
Electric Chromatic Sensor Day Night Mirrors
You know that mirror above your head it has a little lever and you can pull it into night position to reduce the glare from the headlights of the vehicles behind you.
Glare Detection Sensor:
Most of the modern cars come with glare detection sensor installed in the rearview mirrors. The mirrors are Electric Chromatic Mirrors (ECM) The sensor which is mounted in the mirror senses the light level around the vehicle and automatically controls the glare from the vehicles behind you.
You can simply turn the sensor to ON by pressing the 1 button. It’s an automatic dimming function which you can just leave and it will automatically operate. Make sure to look if the indicator is ON and turn OFF if necessary.
{This post is for informational purposes only, some manuals may vary.}


No Comments